 how-to
How Sewer Camera Inspections Work: A Step-by-Step Guide
Last Updated: November 4, 2026
Quick Summary
A sewer camera inspection sends a small waterproof camera through your sewer line on a flexible push rod, showing the pipe's interior on a monitor in real time. A locator pinpoints each defect's depth and position so repair crews know exactly where to dig. The inspector records the footage and gives you a written report of the findings.
- The camera enters through a cleanout, the capped access point near the foundation or property line.
- Most reels have a footage counter, and the inspector notes the distance at each finding.
- A transmitter in the camera head plus an above-ground receiver marks the defect's spot on the surface.
- Ask for the video file and written report before the crew leaves, since a verbal summary is hard to share.
- Heavy debris, standing water, and offset joints can stop the camera or hide what is behind it.
Table of Contents
- What a Sewer Camera Inspection Actually Is
- The Sewer Camera Inspection Process, Step by Step
- What the Camera Reveals: Blockages, Cracks, Roots, and Pipe Damage
- How Long a Sewer Camera Inspection Duration Really Is
- What Drives Sewer Line Camera Inspection Cost
- Sewer Camera Inspection for Home Buyers: What to Request
- Inspection Limitations and Conditions That Affect Results
- What Happens After a Problem Is Found
- Frequently Asked Questions
What a Sewer Camera Inspection Actually Is
A sewer camera inspection is a diagnostic service where a plumber sends a small waterproof camera through your sewer line to see the pipe's interior on a monitor in real time. It shows what is actually happening underground before anyone digs.
Here is the key difference from older methods. A drain snake clears a clog you already know about. A camera tells you why the clog keeps coming back.
The Equipment: Camera Head, Push Rod, Monitor, and Locator
Four pieces make the system work:
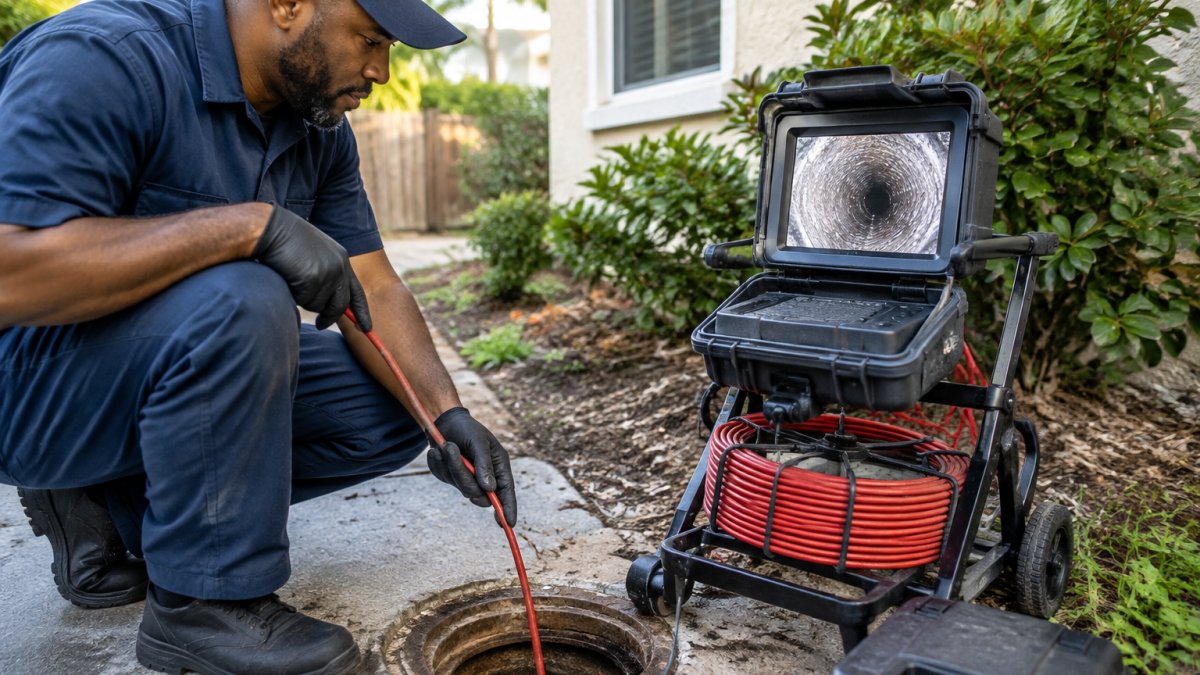
- Camera head: a sealed, waterproof lens on the front of the cable. It has built-in lights so the pipe interior is visible.
- Push rod: a flexible rod that carries the camera. It bends around corners without kinking.
- Monitor: the screen the plumber watches. Most units record the footage.
- Locator: a transmitter in the camera head plus an above-ground receiver. This pinpoints the camera's depth and position so the repair crew knows exactly where to dig.
The locator is the part homeowners rarely hear about. Without it, you would see the damage on screen but not know where under the yard it sits.
Where the Camera Goes In: Cleanouts and Access Points
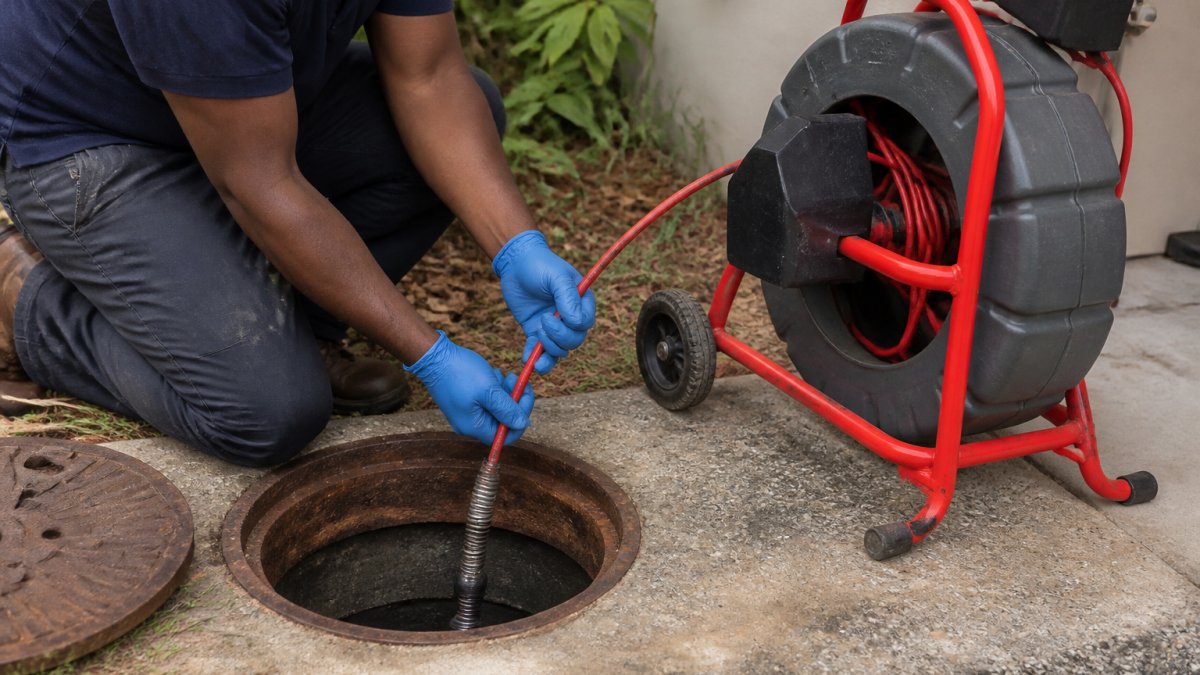
The camera enters through a cleanout, the capped access point on your property. Most homes have one near the foundation or at the property line.
If no cleanout exists, the plumber may go through a roof vent or pull a toilet. A proper cleanout makes the job faster and cleaner. This is also the first thing to check before buying an older house.
See what a camera inspection involves in Miami if you want to schedule one.
The Sewer Camera Inspection Process, Step by Step
Here is the full sewer camera inspection process from arrival to report. The sequence matters because each step sets up the next, a skipped step usually means a second visit.
- Confirm the scope and find the access point. The plumber locates the cleanout, removes the cap, and confirms which line is being inspected, the building lateral to the municipal main, or an interior branch. If the cleanout is buried, the cap is seized, or there is no cleanout at all, the plan changes before any equipment goes in.
- Protect the work area and check the line's condition first. A drop cloth or bucket catches residual water and debris when the cap comes off. A quick pre-scan confirms the camera can pass safely; a line packed with grease or a partially collapsed section may need to be cleared before a full inspection is possible.
- Feed the camera in and track the distance. The push rod guides the camera head down the lateral toward the main. Most reels have a footage counter, and the inspector notes the distance at each finding so the defect can be tied to a physical location later. The camera is pushed, not forced, resistance at a bend or offset is information, not an obstacle to power through.
- Watch and record in real time. The monitor shows the pipe interior live while the footage saves to a recorder. The inspector narrates what is on screen, distance, pipe material, joint condition, and any defect, so the recording is useful even without the inspector present.
- Locate and mark the defect at ground level. When something shows up, the transmitter in the camera head is read by the above-ground receiver. The inspector marks the spot on the surface and notes the depth, which is what lets a repair crew dig in the right place instead of trenching the whole yard.
- Review the findings with you and hand off the report. You see the footage, hear what it means in plain terms, and receive the written findings, defect type, location, severity, and a recommendation. Ask for the video file and the report before the crew leaves; a verbal summary is hard to share with a seller, an insurer, or a second contractor.
Inspection time depends on the line's length, layout, and condition. Watch out: if the inspector cannot reach the main or the far end of the line, the report should say so explicitly, a partial inspection presented as a complete one is the most common way homeowners get misled.
Here is the sequence a sewer camera inspection follows, from arrival to written report.
| Step | What happens |
|---|---|
| 1. Confirm scope and find access | Locate cleanout, remove cap, confirm which line is inspected |
| 2. Protect area and pre-scan | Drop cloth or bucket catches water; quick pre-scan checks camera can pass |
| 3. Feed camera and track distance | Push rod guides camera; footage counter notes distance at each finding |
| 4. Watch and record in real time | Monitor shows pipe interior live while footage saves to a recorder |
| 5. Locate and mark the defect | Above-ground receiver reads transmitter; spot marked on surface with depth |
| 6. Review findings and hand off report | You see footage and receive written findings, severity, and recommendation |
What the Camera Reveals: Blockages, Cracks, Roots, and Pipe Damage
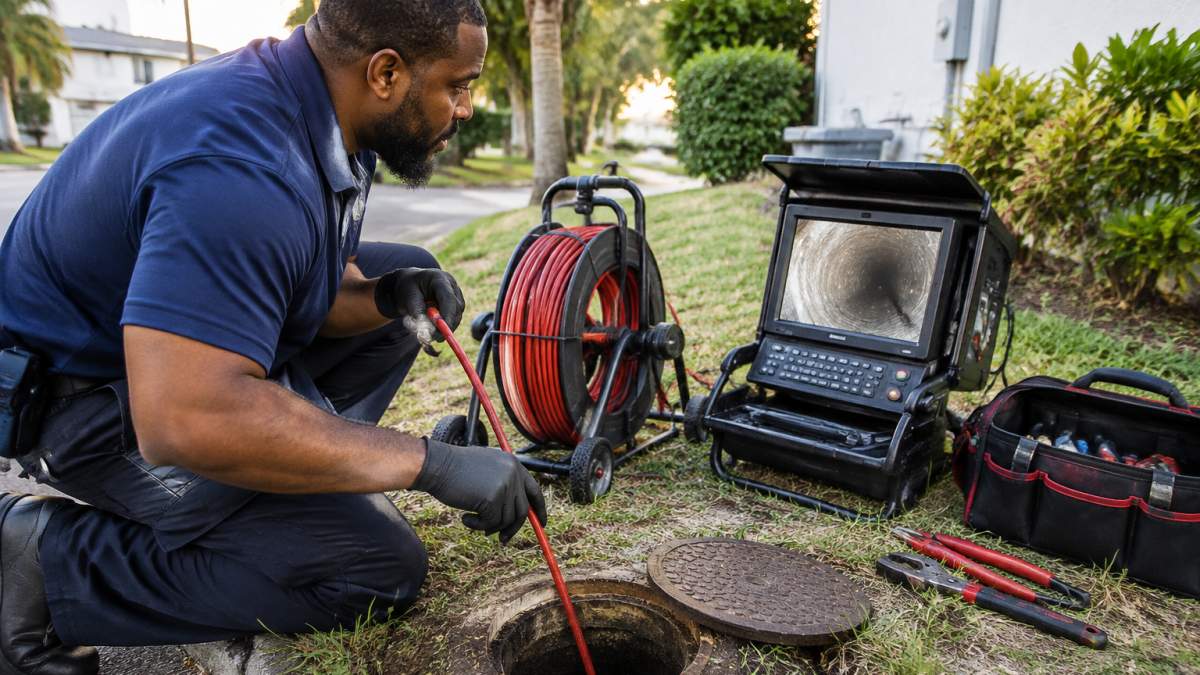
The camera can reveal problems that a snake or plunger does not address. Common findings include:
- Blockages and debris: grease, wipes, and scale build-up narrowing the pipe.
- Tree-root intrusion: roots entering through joints and hairline gaps.
- Cracks and breaks: from shifting soil or age.
- Corrosion and deterioration: common in older cast-iron lines.
- Misalignment and sagging pipe: sections that have settled and now hold water.
- Standing water: a sign the line is not draining as it should.
Reading the Footage and Grading Defect Severity
Not every finding is an emergency. We grade defects by three things: how much of the pipe is blocked, how fast the problem is likely to worsen, and whether water still flows.
A hairline crack near a joint is often a watch item. A collapsed section or a root mass blocking most of the pipe needs action now. Ask the inspector to walk you through the footage and point out each defect. A good report includes the location, the type of damage, and a recommendation.
How Long a Sewer Camera Inspection Duration Really Is
Sewer camera inspection duration depends on three factors:
- Line length: a short run to the street is quick; a long lateral takes longer.
- Access: a clean cleanout speeds things up. A missing one adds time.
- What is found: heavy roots or a collapsed section mean slower, more careful work.
Condo and commercial buildings can run longer because the line is shared and access is trickier.
If you are weighing whether it is worth the time, this article on whether camera inspection is worth it breaks down the trade-offs.
What Drives Sewer Line Camera Inspection Cost
Sewer line camera inspection cost varies by job, not by a flat rate. The main factors:
- Access. Easy cleanout access keeps the job simple. Pulling a toilet or working through a vent adds labor.
- Line length and layout. More pipe and more bends mean more time.
- Building type. Shared condo or commercial lines take longer to navigate and coordinate.
- Add-ons. A recorded video, a written report, or a locator marking can affect the total.
Pricing depends on the specifics of each job. Get a quote to learn what your job involves.
Sewer Camera Inspection for Home Buyers: What to Request
A sewer camera inspection for home buyers is one of the best safeguards before closing.
Ask for these four things:
- A recorded video of the full line, start to finish
- The locator marking depth and position of any defect
- A written report noting each problem and its severity
- The inspector's recommendation: watch, repair, or replace
If the seller's disclosure says "cast iron," get the camera in before you sign. Replacing a main line is a major expense, and you want to know about it while you can still negotiate.
Inspection Limitations and Conditions That Affect Results
A camera cannot see everything. Knowing the limits keeps expectations honest:
- Heavy debris can block the lens and hide what is behind it.
- Standing water clouds the view and hides the pipe floor.
- Offset joints can stop the camera from passing further.
- Very small or damaged pipe may not fit the camera head.
- No cleanout means a harder, less complete inspection.
If the camera cannot reach the end of the line, we tell you that plainly. A partial view is still useful, but it is not the whole picture.
What Happens After a Problem Is Found
Finding the problem is only half the job. Once we know what is wrong and where, we explain your options in plain terms.
For a root mass or heavy debris, drain cleaning and repair clears the line. For a cracked or collapsed section, repair options that avoid digging up the yard may solve it without tearing up landscaping. And if the line is beyond saving, we say so and walk you through replacement.
Our approach is to identify the root cause before any work begins. You see the footage, hear the options, and decide.
Frequently Asked Questions
Is a sewer camera inspection worth it?
It usually is when you have a recurring clog, slow drains across multiple fixtures, or a home built with older cast iron or clay pipe. The camera shows the actual cause, such as roots, a break, or a sagging section, so repairs target the real problem instead of guessing. It also prevents unnecessary digging. For a home purchase, the footage gives you documented evidence of the line's condition before you commit.
How long does a sewer camera inspection take?
Inspection duration grows with longer runs, heavy root intrusion, or multiple access points. A larger commercial line or a building with several cleanouts can take longer. Ask the plumber to record the footage and walk you through it, since review time is part of the visit.
Does a sewer camera inspection require digging?
No. The camera enters through an existing cleanout or access point, so the yard and floors stay intact. That is the main reason it is used before any repair work starts. If the inspection finds a problem, the plumber uses the locator to mark the spot above ground, so any excavation is limited to the exact defect rather than a guessed area.
What should I do after a sewer camera inspection?
Get the recorded footage and a written summary of what was found, including the location and severity of any defect. Ask what the recommended fix is and whether cleaning, hydro jetting, spot repair, or full replacement is needed. If the line is clear, keep the report for your records. If a repair is quoted, request the footage that supports it so you can see the problem yourself.
Underground pipe problems only get worse with time, and guessing wastes money. Authentic Plumbing Services is open 24 hours, 7 days a week, and we use camera inspection to find the real cause before any work begins. Led by Rohan Taylor, our team serves homes, condos, and businesses with clear explanations and honest recommendations. Get started with Authentic Plumbing Services and get a straight answer about what is happening under your property.